Southern Spice Homestyle Delights
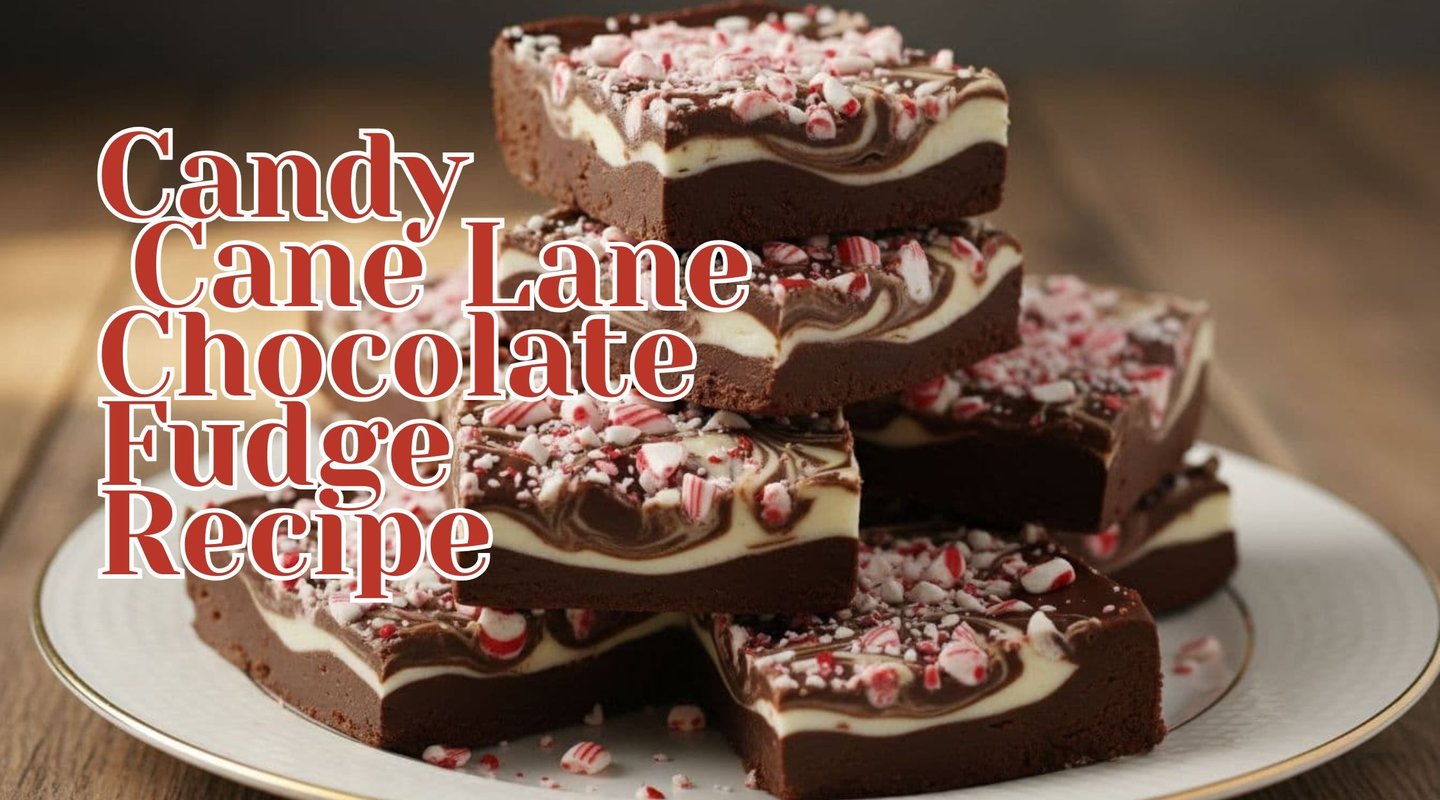
Candy Cane Lane Chocolate Fudge Recipe (Peppermint Holiday Magic)
Make holidays sweeter with this Candy Cane Lane Chocolate Fudge Recipe, a quick peppermint fudge packed with creamy chocolate, crunch, and festive flavor.
RECIPES & COOKING
Shari Smith
12/2/202512 min read
This post may contain affiliate links, and I may earn a commission if you choose to make a purchase through them.

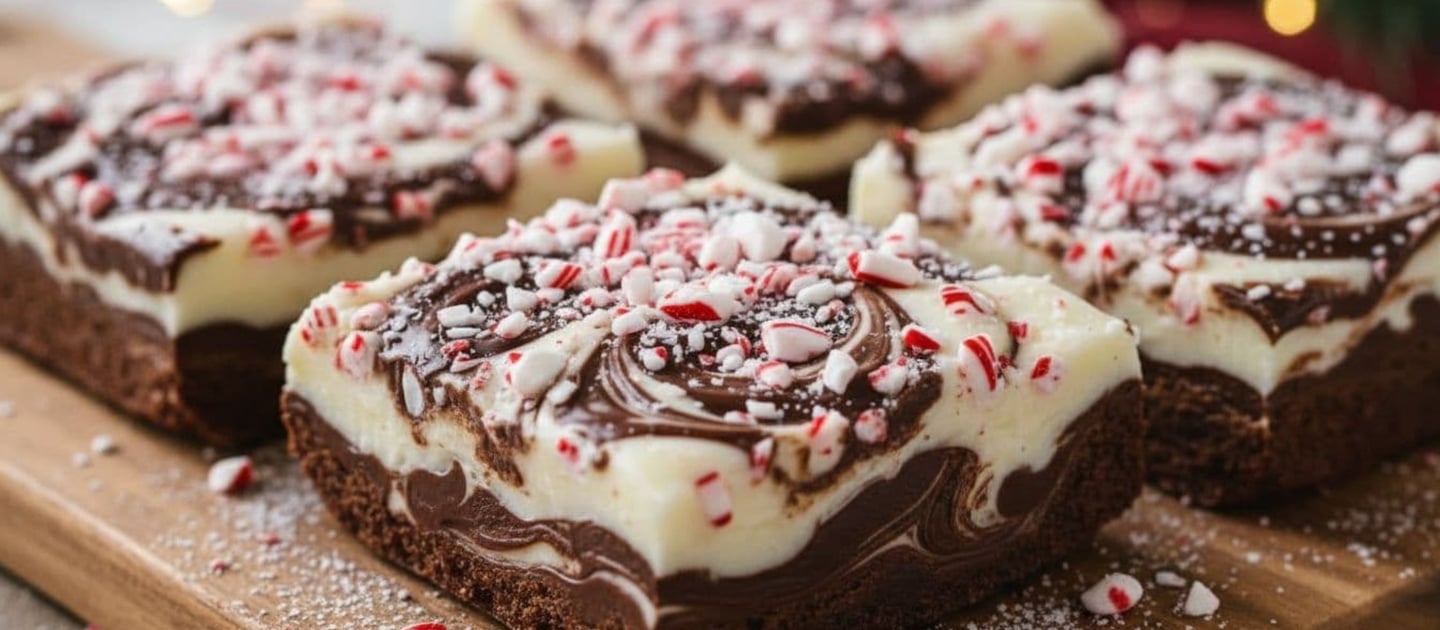
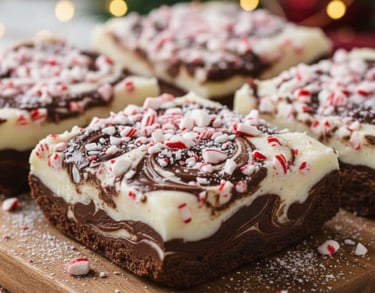
The first time I made this Candy Cane Lane chocolate fudge recipe, my whole kitchen smelled like Christmas. Warm chocolate, cool peppermint, and just enough crunch from candy canes. It tastes like the best part of a December night in every bite.
This fudge checks all the holiday boxes. It is perfect for parties, classroom treats, cookie trays, and sweet little gifts for neighbors. It uses basic pantry ingredients plus candy canes, comes together in minutes on the stovetop or in the microwave, and then quietly sets up in the fridge while you do everything else.
In this post, I will walk you through the ingredients, simple step-by-step directions, fun variations, storage tips, and quick troubleshooting. By the end, you will be able to turn out creamy, rich fudge that is full of peppermint crunch, without any candy thermometer or stress.
What Makes This Candy Cane Lane Chocolate Fudge Recipe So Special?
This fudge tastes like a mug of hot cocoa walked down a snowy street lined with candy canes. The texture is thick and creamy, with smooth chocolate that melts on your tongue. The peppermint is cool and clean, not overpowering, and the crushed candy canes add a gentle crunch and that classic red and white Christmas look.
The method is based on sweetened condensed milk fudge, so it is very beginner friendly. No boiling sugar, no soft-ball stage, and no candy thermometer. If you can stir slowly and pour into a pan, you can make this.
I use real crushed candy canes on top and sometimes fold a bit into the fudge itself. That gives it the Candy Cane Lane look, with tiny red and white sparkles across the surface. On a dessert table, it stands out right away.
This fudge is also very practical. You can make it a few days ahead, it travels well for school events and potlucks, and it stacks neatly in gift boxes and tins. It looks fancy, but the process is relaxed and simple.
When I Love To Serve Candy Cane Chocolate Fudge
I reach for this recipe anytime I need a fast Christmas treat that still feels special. It fits right in with cookies and chocolate bark, but it is faster and less fussy than most baked desserts.
Here are some of my favorite moments to serve it:
Christmas movie night on the couch with blankets
Church events or holiday potlucks
School parties and teacher treat boxes
Office treat trays near the coffee maker
Christmas Eve dessert plates with cookies and fruit
Last-minute gifts when I need something homemade in a hurry
A small plate of this fudge can turn a regular weeknight into a cozy Christmas night.


Who This Easy Holiday Fudge Recipe Is Perfect For
This simple recipe is made for:
Busy parents who do not have time to babysit a candy thermometer
New bakers who want a no-fail Christmas candy recipe
Anyone who feels nervous about traditional fudge but still wants that classic flavor
Kids can help crush the candy canes and sprinkle them on top, which makes this a fun family project. All the ingredients come from a regular grocery store and you do not need any special candy skills.
If you can stir, you are ready.
Ingredients For Candy Cane Lane Chocolate Fudge (And Why Each One Matters)
Here is what I use for a standard 8x8 pan of fudge:
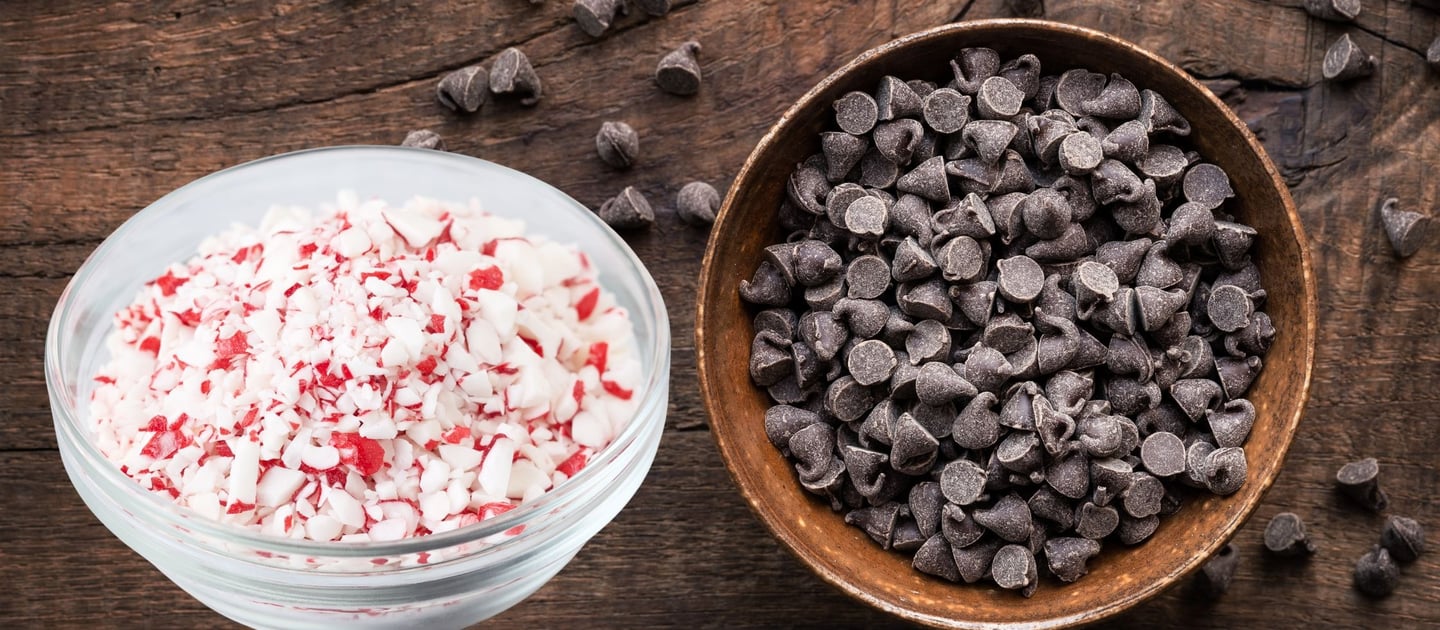
3 cups semi-sweet chocolate chips
1 can (14 ounces) sweetened condensed milk
2 tablespoons unsalted butter
1 teaspoon vanilla extract
1/4 teaspoon fine salt
1/2 to 3/4 cup crushed candy canes, divided for topping and optional mix in
Each ingredient has a job, and once you understand that, it is easy to tweak the recipe for your taste.
Chocolate chips give the fudge structure and rich flavor.
Sweetened condensed milk adds sweetness and a smooth, creamy base.
Butter adds richness and helps the mixture melt evenly.
Vanilla boosts the chocolate flavor.
Salt keeps the fudge from tasting flat.
Crushed candy canes bring peppermint flavor, color, and crunch.
You can mix and match chocolate types, adjust the amount of candy canes, or swap in allergy-friendly options without losing the basic formula.
Chocolate Choices: Semi Sweet, Dark, or Milk?
Semi-sweet chocolate chips make a great base. They give the fudge a deep chocolate flavor that is not too bitter and not too sweet.
Here is how I like to play with the chocolate:
For a sweeter fudge, I swap about 1 cup of the semi-sweet chips for milk chocolate chips.
For a richer, less sweet fudge, I swap 1 cup for dark chocolate chips.
You can also use chopped baking bars instead of chips. Good quality chocolate melts smoother and helps the fudge set with a clean, firm bite.
If you are new to fudge, start with all semi-sweet. Once you taste that batch, you will know if you want the next one sweeter or darker.
Sweetened Condensed Milk, Butter, and Vanilla
Sweetened condensed milk is the heart of this recipe. It is thick, sweet, and sticky, and it gives the fudge its creamy texture. It is not the same as evaporated milk, which is thin and unsweetened. Using evaporated milk by mistake is one of the easiest ways to end up with soft fudge.
The butter melts into the chocolate and milk and helps everything blend into a smooth, shiny mixture. It also makes the fudge taste richer.
Vanilla might seem small, but it makes a difference. It rounds out the chocolate flavor so the fudge tastes like candy shop fudge, not just melted chips in a pan. I always add it after removing the pot from the heat so the flavor stays bright.
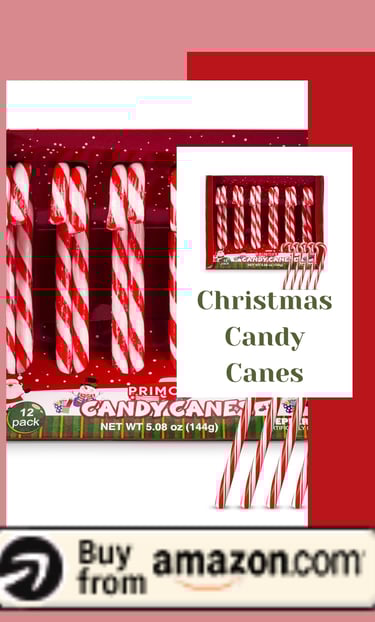
Crushed Candy Canes For That Candy Cane Lane Crunch
Crushed candy canes turn regular chocolate fudge into Candy Cane Lane fudge. I usually sprinkle most of them on top, then fold a small handful into the warm fudge for extra peppermint in every bite.
To crush them, I:
Break the candy canes into pieces.
Place them in a zip-top bag.
Gently hit the bag with a rolling pin or the bottom of a heavy pan.
You do not need perfect crumbs. A mix of small pieces and a little peppermint “dust” looks great.
Classic red and white candy canes give that true holiday look. You can also mix in green or fun flavored candy canes (like cherry or berry) for a playful twist.
Simple Ingredient Swaps and Allergy-Friendly Options
Here are some easy swaps:
Use dairy-free chocolate chips and coconut-milk sweetened condensed milk for a dairy-free version.
Choose gluten-free candy canes if someone is sensitive to gluten.
Use a tiny amount of peppermint extract instead of candy canes if you want flavor without crunch.
Always check labels if you are cooking for someone with allergies. Brands change recipes, and it is safer to read the package every time.

Step By Step: How I Make Candy Cane Lane Chocolate Fudge
The whole process is simple if you move in a calm, steady order. You can use the stovetop (my favorite) or the microwave if you need a shortcut.
Here is the basic flow:
Prep the pan.
Melt chocolate, sweetened condensed milk, and butter.
Stir in vanilla, peppermint flavor, and any mix-ins.
Spread in the pan, top with candy canes, and chill.
Prep The Pan So The Fudge Lifts Out Easily
I line an 8x8 baking pan with parchment paper. You can also use foil if that is what you have.
I press the parchment into the pan and leave two “handles” hanging over the sides. Those little handles make it very easy to lift the whole slab of fudge out once it is set. If the parchment slips, I lightly grease the pan first.
A lined pan means neat squares and less mess.
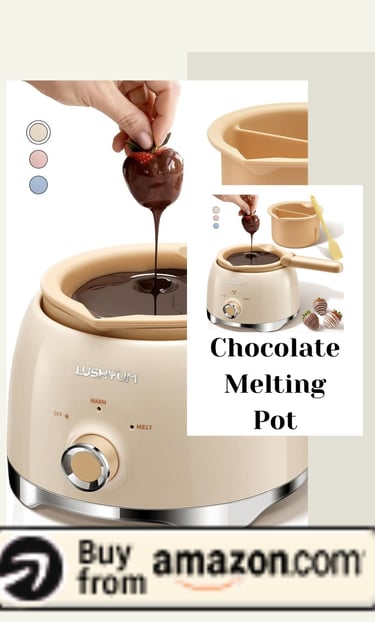
Melt The Chocolate, Butter, and Sweetened Condensed Milk
For the stovetop method, I use a heavy pot over low heat. I add the chocolate chips, sweetened condensed milk, and butter all at once.
I stir slowly and often, scraping along the bottom so nothing burns. The mixture goes from lumpy to thick and smooth, then to shiny and glossy when it is ready. There should be no streaks of chocolate or butter.
For the microwave method, I add the same ingredients to a microwave-safe bowl. I heat on medium power for 20 to 30 seconds at a time, stirring well after each burst, until the mixture is melted and smooth. Heating in short bursts keeps the chocolate from scorching.
Stir In Vanilla, Peppermint Flavor, and Optional Mix Ins
Once the mixture is smooth, I take it off the heat.
I stir in the vanilla extract and, if I want a stronger mint flavor, just 1/4 teaspoon of peppermint extract. Peppermint can get strong very fast, so I start small and taste.
At this stage, I sometimes fold in:
A small handful of finely crushed candy canes
A few tablespoons of mini chocolate chips
These mix-ins give the center of the fudge a little extra texture without making it hard to cut.
Spread, Top With Candy Canes, and Chill Until Firm
I pour the warm fudge into the lined pan and use a spatula to spread it into an even layer. I tap the pan on the counter once or twice to help it settle.
Next, I sprinkle crushed candy canes over the top. I press them gently into the surface so they stick but do not sink.
The pan goes into the refrigerator for at least 2 to 3 hours, or until the fudge feels firm in the center. For the cleanest pieces, I chill it overnight.
To cut, I lift the fudge out by the parchment handles, place it on a cutting board, and use a sharp knife. Running the knife briefly under hot water, then drying it, gives very tidy edges.
The whole process is simple if you move in a calm, steady order. You can use the stovetop (my favorite) or the microwave if you need a shortcut.
Here is the basic flow:
Prep the pan.
Melt chocolate, sweetened condensed milk, and butter.
Stir in vanilla, peppermint flavor, and any mix-ins.
Spread in the pan, top with candy canes, and chill.
Prep The Pan So The Fudge Lifts Out Easily
I line an 8x8 baking pan with parchment paper. You can also use foil if that is what you have.
I press the parchment into the pan and leave two “handles” hanging over the sides. Those little handles make it very easy to lift the whole slab of fudge out once it is set. If the parchment slips, I lightly grease the pan first.
A lined pan means neat squares and less mess.
Melt The Chocolate, Butter, and Sweetened Condensed Milk
For the stovetop method, I use a heavy pot over low heat. I add the chocolate chips, sweetened condensed milk, and butter all at once.
I stir slowly and often, scraping along the bottom so nothing burns. The mixture goes from lumpy to thick and smooth, then to shiny and glossy when it is ready. There should be no streaks of chocolate or butter.
For the microwave method, I add the same ingredients to a microwave-safe bowl. I heat on medium power for 20 to 30 seconds at a time, stirring well after each burst, until the mixture is melted and smooth. Heating in short bursts keeps the chocolate from scorching.
Stir In Vanilla, Peppermint Flavor, and Optional Mix Ins
Once the mixture is smooth, I take it off the heat.
I stir in the vanilla extract and, if I want a stronger mint flavor, just 1/4 teaspoon of peppermint extract. Peppermint can get strong very fast, so I start small and taste.
At this stage, I sometimes fold in:
A small handful of finely crushed candy canes
A few tablespoons of mini chocolate chips
These mix-ins give the center of the fudge a little extra texture without making it hard to cut.
Spread, Top With Candy Canes, and Chill Until Firm
I pour the warm fudge into the lined pan and use a spatula to spread it into an even layer. I tap the pan on the counter once or twice to help it settle.
Next, I sprinkle crushed candy canes over the top. I press them gently into the surface so they stick but do not sink.
The pan goes into the refrigerator for at least 2 to 3 hours, or until the fudge feels firm in the center. For the cleanest pieces, I chill it overnight.
To cut, I lift the fudge out by the parchment handles, place it on a cutting board, and use a sharp knife. Running the knife briefly under hot water, then drying it, gives very tidy edges.
Fun Variations On My Candy Cane Lane Chocolate Fudge
Once you master the base recipe, it is easy to switch it up for different crowds or occasions.
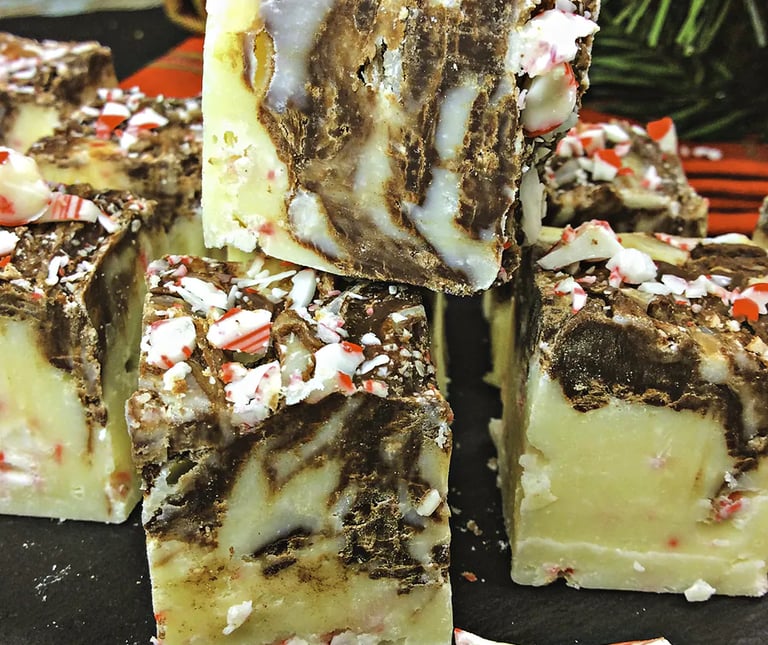
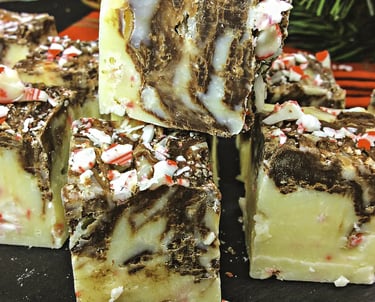
Milk Chocolate or White Chocolate Candy Cane Fudge
You can trade some or all of the semi-sweet chips for milk chocolate if your family loves sweeter fudge.
For a bright “snowy” look, I use white chocolate chips with crushed red candy canes on top. The white and red together pop on a cookie tray. White chocolate can be softer, so I chill these batches a bit longer and keep them in the fridge until serving.
Layered Peppermint Fudge With Two Colors
For a pretty layered effect, I make a batch of chocolate fudge for the bottom, pour it into the pan, and chill until set.
Then I make a small batch of white chocolate peppermint fudge, pour it over the chilled chocolate layer, and smooth it out. I finish with candy canes on top.
When you cut it, you get neat stripes of chocolate and white, and it looks like something from a fancy candy counter.
Rocky Road Candy Cane Fudge With Marshmallows
For a fun twist, I fold mini marshmallows and chopped nuts into the fudge along with the candy canes. Walnuts or almonds work well.
The result tastes like a rocky road candy bar with a holiday update. Chewy, crunchy, and minty all at once.
If you are serving people with nut allergies, just skip the nuts and keep the marshmallows.
How To Store, Freeze, and Gift Candy Cane Chocolate Fudge
This fudge keeps well, which makes it perfect for planning ahead and for gifting.
Storing Fudge So It Stays Fresh and Creamy
I store cut squares in an airtight container. I place a piece of parchment or wax paper between layers so they do not stick.
In a cool house, the fudge can stay at room temperature for about 3 to 4 days. In the fridge, it keeps for about 1 to 2 weeks.
The peppermint flavor often gets a little stronger after a day, which I love. It tastes like the candy and chocolate had time to become friends.
Freezing Candy Cane Fudge For Make-Ahead Treats
To freeze, I chill the fudge until firm, then wrap the whole slab or individual squares tightly in plastic wrap. After that, I place them in a freezer-safe bag or container.
The fudge can stay frozen for up to 2 months. To serve, I thaw it in the fridge, then let it sit at room temperature until just soft enough to bite.
The candy cane topping may not be quite as crisp after freezing, but the flavor stays bright and minty.
Easy Gift Ideas Using Candy Cane Lane Chocolate Fudge
This fudge makes sweet, budget-friendly gifts.
Some of my favorite ideas:
Line a holiday tin with parchment and fill it with fudge cubes.
Pack small boxes or mason jars with mixed fudge and cookies.
Add a few pieces of fudge to a cookie platter for teachers or coworkers.
I like to tie on a simple ribbon and a handwritten recipe card so friends can make their own batch next year. It feels personal and generous without taking all day.
Simple Fixes: Candy Cane Fudge Problems And How I Solve Them
Even with an easy recipe, things happen. Here is how I handle the most common fudge issues.
What If My Fudge Is Too Soft or Will Not Set?
First, I give it more time in the fridge. Sometimes that alone fixes it. If my kitchen is warm, I move the container to a colder spot or even to the freezer for 20 to 30 minutes.
Using the full amount of chocolate and a real can of sweetened condensed milk (not evaporated milk) helps it set firm. If it still stays soft, I cut it into small pieces and serve it in mini cups or spoons. The flavor is the same, just in a different shape.
How I Avoid Grainy, Gritty, or Burned Fudge
To avoid grainy or burned fudge, I always melt the mixture on low heat and stir often. On the microwave method, I keep the bursts short and stir well between each one.
If the chocolate gets thick, dry, or chalky, it likely overheated. At that point it is hard to fix, but I sometimes press it into a thin layer and use it as a warm topping over ice cream or brownies so it does not go to waste.
Keeping Candy Cane Pieces Pretty and Crunchy
Candy canes can melt or bleed color if they hit very hot fudge or sit in a humid kitchen.
I let the fudge cool for a few minutes before adding the candy canes, and I press them in lightly. I store the finished fudge in a cool, dry place and try to serve it within a few days for the best look and crunch.
If some color does bleed, the fudge still tastes great. It just looks more “swirled” and less crisp.
Bringing Candy Cane Lane Fudge Into Your Holiday Tradition
This simple Candy Cane Lane chocolate fudge recipe brings a cozy holiday feeling into any home. It uses basic ingredients, comes together in minutes, and still looks special enough for gift boxes and dessert tables.
Try it once as written, then play with the variations and mix-ins until it feels like your family’s signature Christmas fudge. Hand a piece to someone you love, turn on the tree lights, and enjoy the quiet moment.
If you make a batch, I would love to hear which version you tried or see a photo of your fudge. Share your favorite add-ins, or sign up for more easy holiday dessert recipes so we can keep baking through the season together.
Southern Spice Homestyle Delights © 2025. All rights reserved.
Address
Rayville, La 71269
Want more from Southern Spice?


Get recipes, cooking inspiration, and exclusive information right to your inbox!
Categories