Southern Spice Homestyle Delights
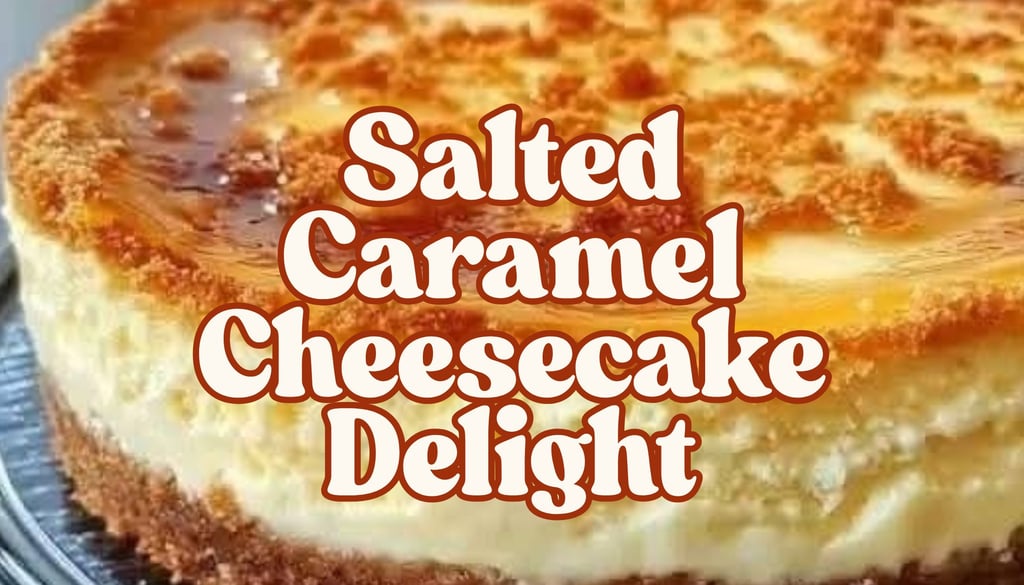
The Ultimate Salted Caramel Cheesecake Recipe: A Sweet and Salty Delight
Indulge in the perfect mix of sweet and salty with this salted caramel cheesecake recipe. Creamy, rich, and topped with golden caramel sauce.
RECIPES & COOKING
Shari Smith
4/11/202511 min read
This post may contain affiliate links, and I may earn a commission if you choose to make a purchase through them.
Salted caramel cheesecake is pure dessert perfection. It’s the kind of treat that balances indulgence with sophistication, blending creamy cheesecake with the buttery sweetness of caramel and a touch of salt to make every bite unforgettable.
This combination of flavors captures the best of both worlds: sweet and salty, smooth and bold. Whether you’re hosting a gathering or simply craving something extraordinary, this recipe makes it easy to bring a bakery-quality dessert to your table.
Get ready to impress your taste buds and anyone lucky enough to share a slice.
Ingredients for a Perfect Salted Caramel Cheesecake
To make a truly unforgettable salted caramel cheesecake, the ingredients must work harmoniously to create perfect layers of flavor and texture.
From the buttery crust to the creamy filling and the luxurious salted caramel sauce, each component brings something essential to the table.
Here’s what you’ll need for every layer of this decadent dessert.

For the Crust
The crust is the backbone of your cheesecake—the firm yet crumbly base that provides texture and balance to the rich filling. A good crust isn’t just an afterthought; it’s the foundation of flavor.
Ingredients:
2 ⅓ cups Pretzel Pieces crushed in a food processor until they form fine crumbs
6 tablespoons of salted butter, melted
2 tablespoons of granulated sugar
Why is the crust so important? It gives the cheesecake a sturdy structure and a slight crunch that contrasts beautifully with the creamy layers.
The crushed pretzels bring a warm, slightly salty flavor, while the butter binds them together, ensuring the crust doesn’t fall apart. Add a touch of sugar for extra sweetness, and you’ve got the perfect base for your salted caramel cheesecake recipe.
For the Cheesecake Filling
Creamy, smooth, and rich—the filling is the star of this dessert. It’s what turns simple ingredients into a decadent showstopper that melts in your mouth.
Ingredients:
24 ounces (three 8-ounce blocks) of cream cheese, softened
1 cup of granulated sugar
3 large eggs
1 teaspoon of pure vanilla extract
½ cup of heavy cream
Each ingredient in the filling plays an important role. Softened cream cheese is the heart of the cheesecake, providing its signature tang and creaminess.
Sugar sweetens the mixture to perfection, while eggs create a silky, custard-like texture that holds everything together. A splash of vanilla extract enhances the flavor, giving the filling depth.
Finally, heavy cream adds richness, taking the texture to another level and ensuring every bite feels indulgent and satisfying.
For the Salted Caramel Sauce
The salted caramel sauce is the pièce de résistance that ties the entire dessert together. Sweet and buttery with just the right amount of salt, this sauce drapes over the cheesecake like liquid gold.
Ingredients:
1 cup of granulated sugar
6 tablespoons of unsalted butter, cut into chunks
½ cup of heavy cream
1 teaspoon of sea salt (adjust to taste)
Making salted caramel sauce is all about balance. The sugar caramelizes into a deep amber syrup that’s both sweet and slightly smoky. Butter adds smoothness and depth, while the heavy cream brings a luxurious, silky texture.
A sprinkle of sea salt cuts through the sweetness, creating that irresistible sweet-and-salty contrast that makes this salted caramel cheesecake recipe so special. Pro tip: opt for coarse sea salt for tiny bursts of salty flavor in every bite.


Step-by-Step Directions
Now that you've gathered all your ingredients, it’s time to bring this salted caramel cheesecake recipe to life. Follow these simple steps to create a dessert that looks and tastes like it came straight from a professional bakery.
Preparing the Crust
The crust is where the magic starts, forming the base that holds every luscious bite together. Here’s how to get it just right:
Crush the pretzels into fine crumbs. You can do this by placing them in a zip-top bag and rolling over them with a rolling pin or using a food processor for finer results. Aim for a sand-like texture.
In a mixing bowl, combine:
1 ½ cups of crushed pretzels
6 tablespoons of melted salted butter
2 tablespoons of granulated sugar
Mix until the crumbs resemble damp sand, evenly coated with butter. The mixture should easily stick together when pinched.
Press the mixture into the bottom of a springform pan, creating an even layer. Use the bottom of a flat glass or measuring cup to help pack it firmly and evenly.
For added stability and flavor, bake the crust at 325°F (160°C) for 8-10 minutes. Let it cool completely before adding the filling. If you’re short on time, chilling the pressed crust in the fridge for 15 minutes works too, though baking enhances its structure.
Making the Cheesecake Filling
The key to that smooth, creamy cheesecake texture lies in a perfectly mixed filling. Here’s how to master it:
In a large mixing bowl, beat 24 ounces of softened cream cheese until light and fluffy. Softening the cream cheese beforehand prevents lumps.
Gradually add 1 cup of granulated sugar and continue mixing until fully incorporated.
Blend in 3 large eggs, one at a time, mixing until just combined after each addition. Avoid overmixing to keep air from getting trapped in the batter, which can lead to cracks later.
Stir in 1 teaspoon of vanilla extract and ½ cup of heavy cream. Fold gently until the batter is smooth, but again, do not overmix.
Pro tip:
Scrape down the sides and bottom of the bowl regularly to ensure all ingredients are evenly incorporated
Assembling the Cheesecake
Now that your crust is ready and your filling is silky smooth, it’s time to assemble the cheesecake:
Pour the cream cheese filling over the cooled crust, spreading it out evenly with a spatula. Use gentle motions to eliminate any air bubbles that might settle in the batter.
To prevent cracks, it’s best to bake the cheesecake in a water bath (aka a bain-marie). Wrap the outside of your springform pan with foil to prevent leaks, and place it in a larger baking dish. Fill the dish with hot water until it reaches halfway up the sides of the springform pan.
Bake the cheesecake at 325°F (160°C) for approximately 55-60 minutes. The edges should be set while the center still has a slight jiggle when you gently shake the pan.
Once baked, turn off the oven, crack the door open slightly, and let the cheesecake cool in the water bath for an hour. This gradual cooling helps prevent any splitting across the surface.
Remove the cheesecake from the water bath and let it cool completely at room temperature before chilling in the refrigerator for at least 4 hours—overnight for best results.


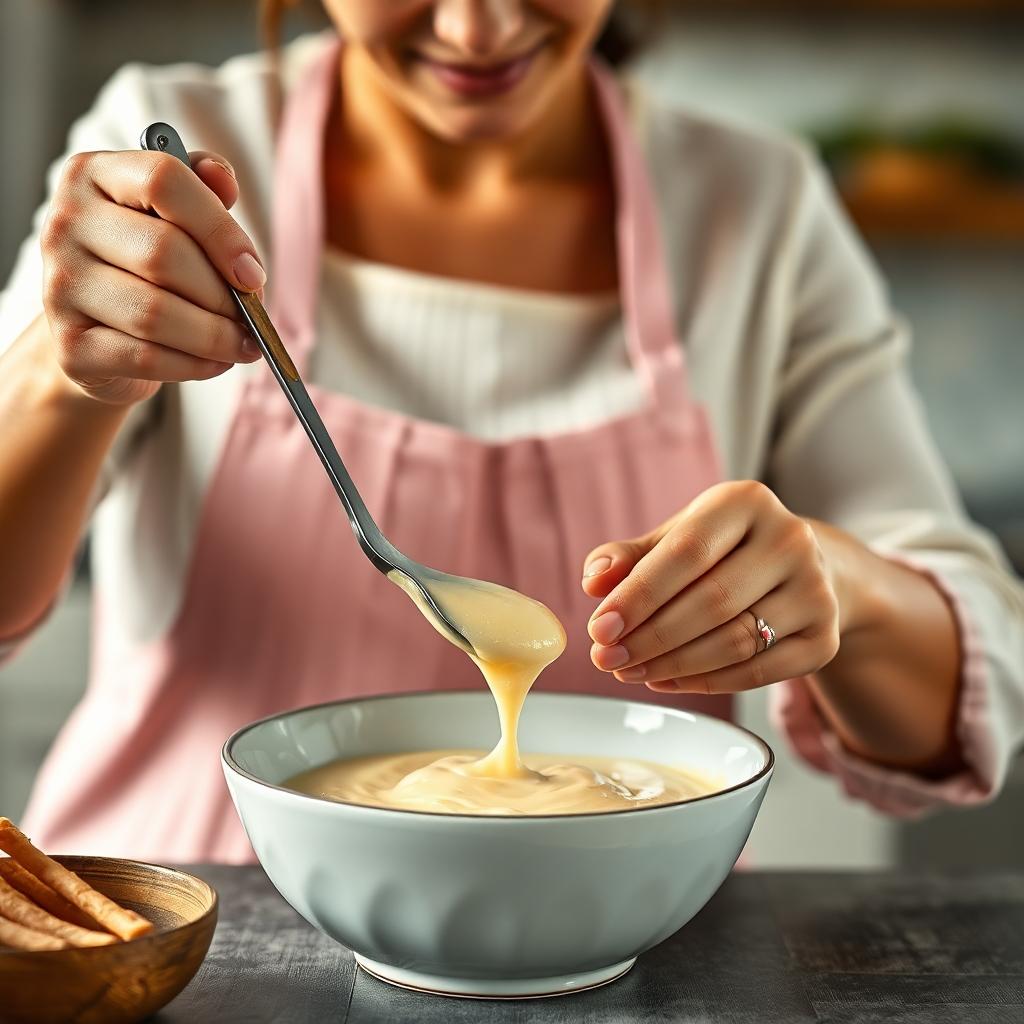
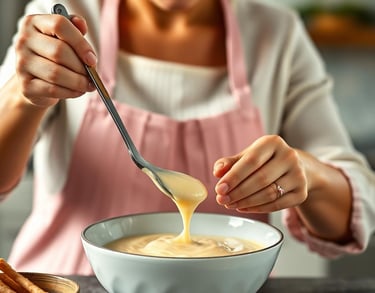
Creating the Salted Caramel Sauce
The salted caramel sauce is the crown jewel of this recipe—rich, golden, and perfectly balanced. With a little patience and the right technique, you’ll create a sauce that’s truly swoon-worthy:
In a medium saucepan, heat 1 cup of granulated sugar over medium heat. Stir constantly with a heatproof spatula or wooden spoon as the sugar melts into a golden-amber liquid. Be patient, as the sugar will clump before it fully liquified.
Once melted, quickly stir in 6 tablespoons of butter (cut into chunks). Be careful, as the mixture will bubble up vigorously. Keep stirring until the butter is completely incorporated.
Slowly pour in ½ cup of heavy cream while stirring—again, the mixture will bubble up. Continue to stir until smooth.
Remove the caramel from the heat and mix in 1 teaspoon of sea salt. Let it cool slightly to thicken for drizzling but not harden completely.
Pro tips:
For a thinner sauce, add a splash of extra cream, one tablespoon at a time, until the desired consistency is achieved.
Keep a careful eye on the sugar while melting—it can go from perfect to burnt in seconds.
Final Assembly and Chilling
Now it’s time to bring everything together and give your cheesecake that show-stopping finish:
Once the cheesecake is fully chilled, remove it from the springform pan and place it on a serving dish.
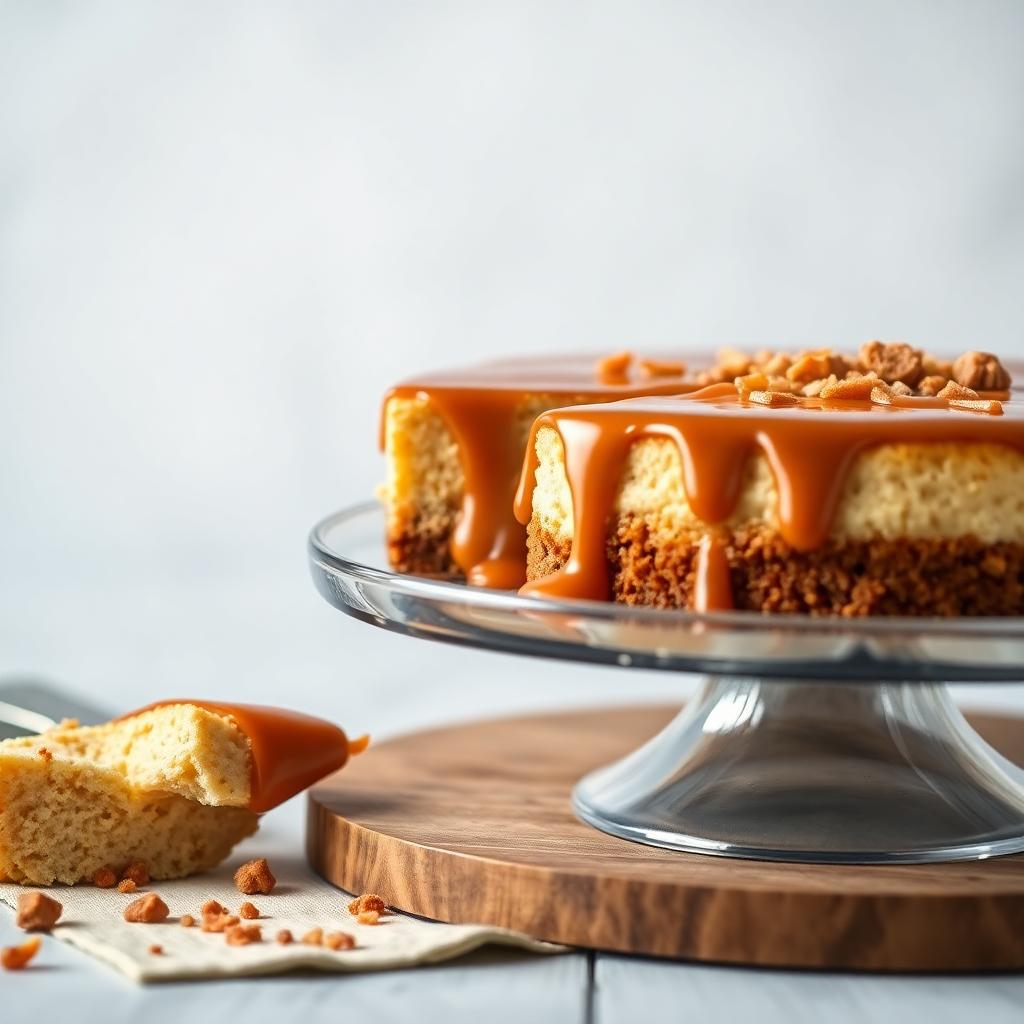
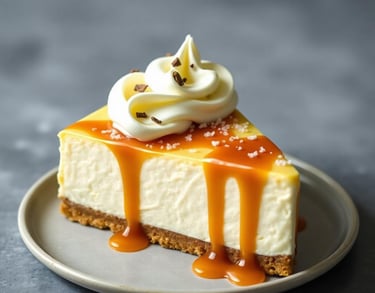
Generously drizzle the salted caramel sauce over the top of the cheesecake, letting it cascade naturally down the sides for a rustic, elegant look. Use as much or as little as you like, depending on your preference.
For a professional touch, sprinkle a pinch of flaky sea salt over the caramel. The flakes add extra texture and a pop of salty flavor that pairs perfectly with the sweetness.
Chill the assembled cheesecake for about 30 minutes to help the caramel set slightly before slicing.
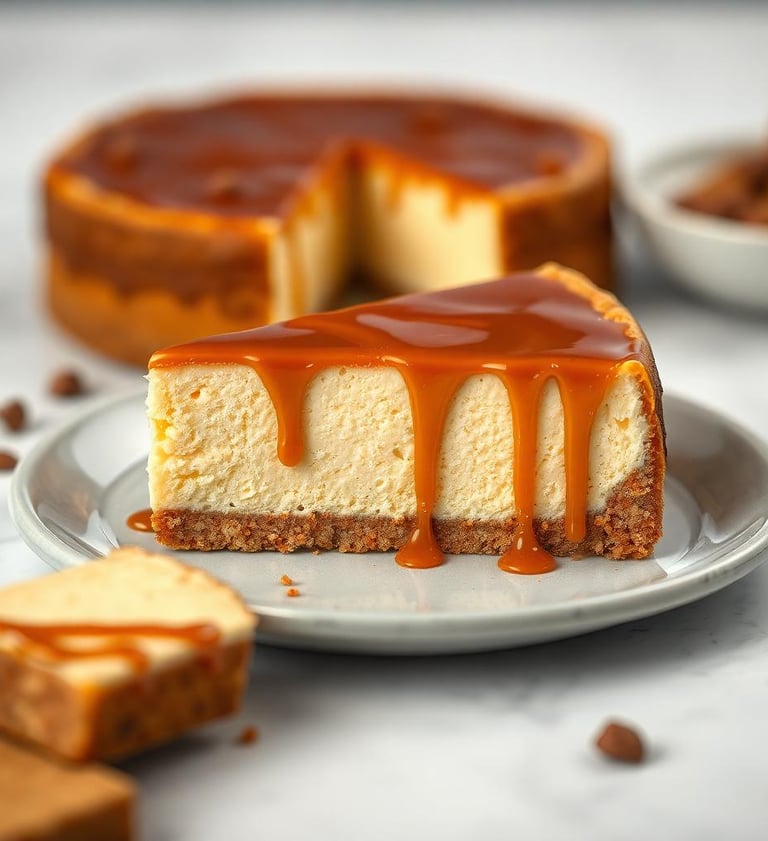
And there you have it: a masterpiece that’s ready to serve! Each layer—from the crumbly crust to the creamy filling and the rich caramel topping—comes together to create the ultimate salted caramel cheesecake recipe.
Tips to Make the Best Salted Caramel Cheesecake
When it comes to creating the perfect salted caramel cheesecake, it’s all about paying attention to the details. A flawless cheesecake isn’t just about following the recipe; it’s about mastering the techniques that elevate your dessert from good to unforgettable. Here’s how you can make sure every slice is smooth, rich, and utterly decadent.
Preventing Cracks in the Cheesecake
Nothing is sadder than a cracked cheesecake after hours of effort, but with a few simple strategies, you can avoid this common mishap.
Use a water bath: Baking your cheesecake in a water bath helps distribute heat evenly and prevents the outer edges from cooking faster than the center. To do this, wrap your springform pan tightly in foil to keep water out, then place it in a larger baking dish filled with hot water.
Don’t overbake it: Overbaking dries out the filling and is one of the primary culprits behind cracks. Remove the cheesecake from the oven when the edges are set, but the center still has a slight jiggle. Cheesecakes continue to set as they cool.
Cool it gradually: Sudden temperature changes can cause the cheesecake to contract too quickly, leading to cracks. Once your cheesecake is baked, turn off the oven, crack the door open, and let it cool for at least an hour before bringing it to room temperature.
Perfecting the Salted Caramel Sauce
The salted caramel sauce is the star of this dessert, and nailing its consistency and taste is essential. The good news? With a bit of patience, you’ll have a golden sauce that’s pure perfection.
Use a candy thermometer: Caramel can be tricky because sugar transforms quickly from golden amber to burnt. A thermometer takes the guesswork out. Aim for around 340°F (170°C) for perfect caramelization.
Balance the flavors: Start with the recommended amount of sea salt, but adjust gradually to suit your taste. Too much salt can overpower the caramel, while too little won’t give you that signature contrast. Taste as you go.
Keep stirring: Once the sugar has melted, stirring consistently is your best friend. It prevents burning and ensures a smooth, lump-free sauce. Remember, caramel is all about timing, so stay attentive and avoid multitasking.
Pro tip:
If your caramel seizes (turns lumpy) while adding the butter or cream, don’t panic! Just return it to low heat and stir gently until it smooths out again.
Storing and Freezing the Cheesecake
Making a cheesecake ahead of time is a smart move, especially since it tastes even better after chilling. But knowing how to store it properly ensures you maintain that creamy texture.
Refrigerating leftovers: Once your cheesecake is set and fully chilled, store any leftovers in an airtight container in the refrigerator. It will stay fresh and delicious for up to 5 days. Keep the caramel sauce separate and pour it on individual slices as needed for best results.
Freezing for the future: Want to save your masterpiece for later? Wrap the whole cheesecake or individual slices tightly in plastic wrap, then add a layer of aluminum foil to prevent freezer burn. Freeze for up to 2 months. When ready to enjoy, thaw in the fridge overnight for a dessert that tastes just as fresh as the day you made it.
By following these tips, you’ll keep your salted caramel cheesecake tasting bakery-fresh while preserving its show-stopping appearance. Whether it’s stored for days or weeks, this dessert is guaranteed to impress every time.
Serving Salted Caramel Cheesecake
Once you’ve perfected your salted caramel cheesecake, the next step is presenting it as the show-stopping dessert it deserves to be. From creative garnishing ideas to pairing it with complementary beverages, how you serve this masterpiece can elevate the entire experience. Let’s explore ways to make every slice unforgettable.
Garnishing Ideas
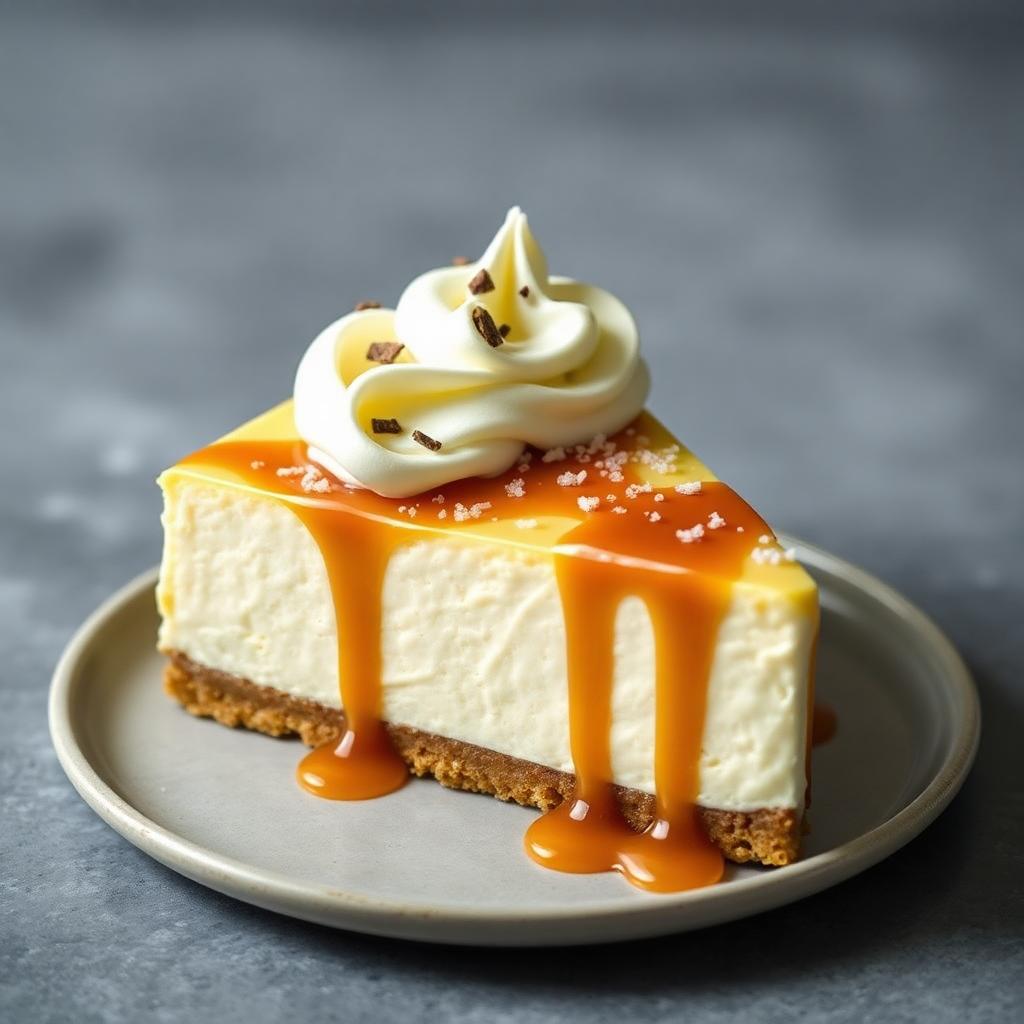
The right garnish can enhance the flavor of your salted caramel cheesecake and add a visual flair that will wow your guests. While the caramel drizzle alone looks stunning, these topping ideas can take things to the next level:
Whipped cream: A dollop of fresh, lightly sweetened whipped cream adds an airy contrast to the rich cheesecake filling. Use a piping bag for a professional touch, or keep it rustic with a simple swirl.
Sea salt flakes: Sprinkle flaky sea salt sparingly over the top. The shimmering crystals enhance the salted caramel flavor while providing a satisfying crunch.
Extra caramel drizzle: Drizzle additional salted caramel sauce over each slice, letting it cascade down the sides for a sophisticated, indulgent finish.
Fresh fruit: Add a pop of color and brightness with fresh berries like raspberries, strawberries, or blackberries. Their slight tartness balances the sweetness beautifully.
Chocolate shavings or curls: For an extra layer of decadence, garnish with dark or milk chocolate shavings to create a stunning contrast against the caramel.
Feel free to mix and match these ideas, tailoring the garnishes to the occasion. A holiday gathering might call for a scattering of candied nuts, while a romantic dinner could feature edible flower petals for a touch of elegance.
Pairing Suggestions
Salted caramel cheesecake already delivers an explosion of flavors: creamy, sweet, salty, and buttery. To complement these notes, the perfect beverage pairing is essential. Here are some tried-and-true options:
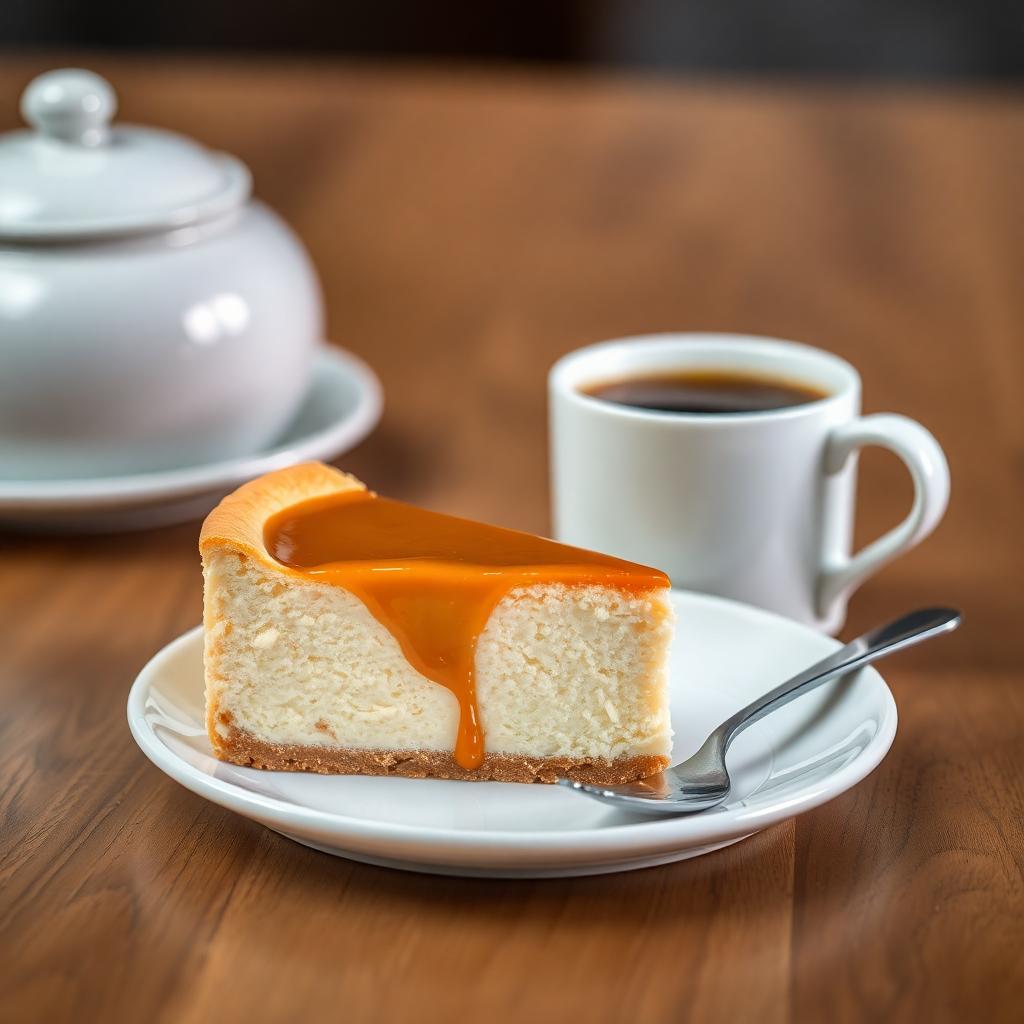
Coffee: A cup of hot, freshly brewed coffee is a classic partner. Choose a medium or dark roast to cut through the sweetness or go for a flavored brew like hazelnut to enhance the caramel tones. If you prefer something cold, an iced latte with a hint of vanilla also works wonderfully.
Espresso: The intensity of a smooth espresso shot pairs perfectly with the richness of cheesecake. Its bold, concentrated flavor acts as a palate cleanser between bites.
Dessert wine: Sweet wines like Sauternes, Moscato, or Port are ideal companions. Their fruity undertones harmonize with the caramel while their natural acidity balances the richness.
Hot chocolate: For an ultra-decadent pairing, serve with a creamy mug of hot chocolate. Consider topping the drink with whipped cream or a drizzle of the same salted caramel for a cohesive experience.
Milk or milk alternatives: A glass of cold milk—whether dairy or plant-based—offers a refreshingly simple contrast. For an elevated touch, try almond or coconut milk for their natural nutty sweetness.
When serving salted caramel cheesecake, the goal is to enhance its flavors without overwhelming the palate. Beverages with balanced sweetness, complementary notes, or refreshing characteristics ensure every bite stands out. Pair thoughtfully, and you’ll leave everyone savoring the experience long after the last crumb is gone.


Southern Spice Homestyle Delights © 2025. All rights reserved.
Address
Rayville, La 71269
Want more from Southern Spice?


Get recipes, cooking inspiration, and exclusive information right to your inbox!
Categories